This documentation is always evolving.
You have a list of locations and you need to get all of them quickly on a map? With Mapcreator that’s no problem at all! There are a few things you need to take into consideration to make the import process smooth and efficient. Let’s have a look at them together.
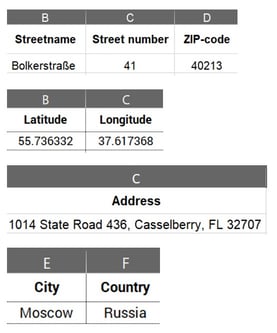
The most important information is the address information. If you import latitudes and longitudes, make sure they are separated in one column each. For address lines, which can consist of street names, numbers, ZIP codes or city names, keep in mind that the more information you provide, the more detailed the tool will be able to pinpoint a marker. You may also import a file that contains city names only. It can be that the tool does not place the marker where you intend it to, since a city name probably exists several times in this world.
These are the location saving options visually explained:
Mapcreator supports file imports with up to 1.000 location entries.
Import icon names
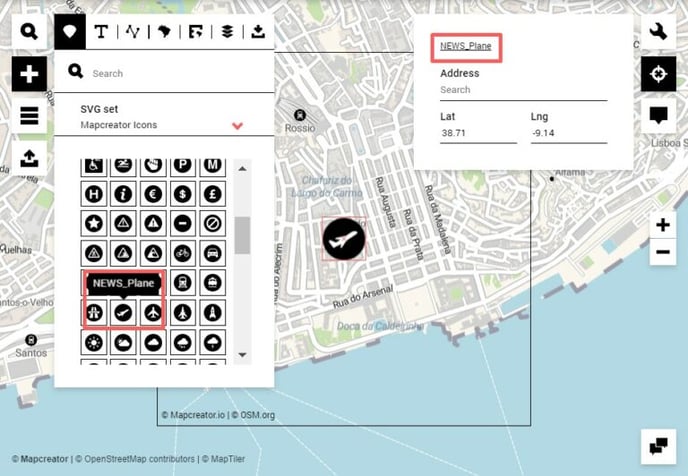
There are additional ways that make the files import process easy and allow you to link information almost automatically. For instance, did you know you can store an icon’s name so the tool will place the corresponding icon right away? To make this happen, let’s go find the icon name in the tool. You can either obtain it via hovering over an icon, or you copy and paste the icon name in the styling menu.
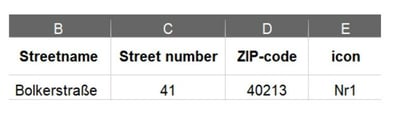
In your spreadsheet, you’ll have to add a column header ‘icon’ and store the icon name in the cells underneath. There is no limit how many icon names can be stored, as long as they’re unique the tool will load the correct one immediately.
At this point, your spreadsheet may look as follows:
Pro tip: If you look to import numbers on icons, make sure you have the ‘Mapcreator Numbering’ icon set in your account. Contact our support team if you don’t find it in your tool.
Import labels
Additionally, we can load labels via the import as well. To make this happen, add a column header ‘text’, ‘label’, ‘name’, ‘location name’ or ‘tekst’. Store any label you’d like to attach to a marker in there, and the tool will place it as a label with the marker.
Pro tip: You can style the associated markers and make them transparent. That way you’ll only have labels without markers.
Next to facilitating the editing work in the tool, you can also add interactivities to the markers you’re importing. We’re covering everything you need to know about the how-to here.
Import colors
Icons or textbox elements that consist of one main color field, can get a certain color automatically assigned via the import file. The color header for these needs to be ‘iconcolor’, ‘iconcolour’, ‘icon color’, ‘icon color’, ‘iconcolors’, ‘iconcolours’, ‘icon colors’, ‘icon colours’.
You can also set it hindsight, using the table management menu. The supported colors are RGB and hexadecimal.
Examples: rgb(255,92,92), rgba(255,92,92,1), (#ff5c5c).
Import lines
Let the tool draw lines, curves and routes automatically for you! Add the column header "linetype" (or "line type") and specify "Bezier", "Route" or "Line". You'll also need location anchors such as lat/long or address-data. If you have a place A and place B and specify "bezier" at place B, a curved line will be drawn between place A and B. Once imported, you can click on the line in the tool and bend/drag the curve in any direction and style it to your liking.
Additionally, you can specify per column header "lineorder" (or "line order") and using numbers 1, 2, 3 etc which line should get drawn first.

You can try it out with this file.
Import legend categories
The tool automatically creates a legend with entry names according to the column header "legend" or "category". Every unique value found in the cells creates a new entry in the legend. Combined with the feature of importing colours, the colour selector of the legend entry automatically picks the corresponding icon colour as well.
If you create an interactive map, the legend even acts as a filter feature and you can let your website visitor interact with your map even more.